Connect Data Parsers With The UI
To enable attributive styling, we have to add the data format we already read in to the Style component. This can be done
via the data property.
//...
<Style
    data={data}
/>
//...
We can do the same for the PreviewMap component, so that the preview also displays the data.
//...
<PreviewMap
    style={style}
    data={data}
/>
//...
In our application this looks as follows:
import React, { useState, useEffect } from 'react';
import { Stroke, Fill, Style as OlStyle, Circle } from 'ol/style';
import { Style, PreviewMap } from 'geostyler';
import OlParser from 'geostyler-openlayers-parser';
import WfsParser from 'geostyler-wfs-parser';

import 'antd/dist/antd.css';

const olParser = new OlParser();
const wfsParser = new WfsParser();

function App() {

  const wfsParams = {
    url: 'https://ows-demo.terrestris.de/geoserver/terrestris/ows',
    version: '1.1.0',
    typeName: 'terrestris:bundeslaender',
    srsName: 'EPSG:4326'
  };

  const olStyle = new OlStyle({
      stroke: new Stroke({
          color: 'rgba(255, 255, 255, 1.0)',
          width: 1
      }),
      fill: new Fill({
          color: 'rgba(0, 0, 0, 1)'
      }),
      image: new Circle({
          fill: new Fill({
              color: 'rgba(255, 0, 0, 1.0)'
          }),
          radius: 5
      })
  });

  const [style, setStyle] = useState();
  const [data, setData] = useState();

  useEffect(() => {
    olParser.readStyle(olStyle)
      .then((geostylerStyle) => {
        setStyle(geostylerStyle.output);
      });

    wfsParser.readData(wfsParams)
      .then((gsData) => {
        setData(gsData);
      });
  }, []);

  return (
    <div>
        <Style
          style={style}
          data={data}
          compact={true}
          onStyleChange={(newStyle) => {setStyle(newStyle)}}
        />
      {
        style && (
          <PreviewMap
            style={style}
            data={data}
          />
        )
      }
    </div>
  );
}

export default App;
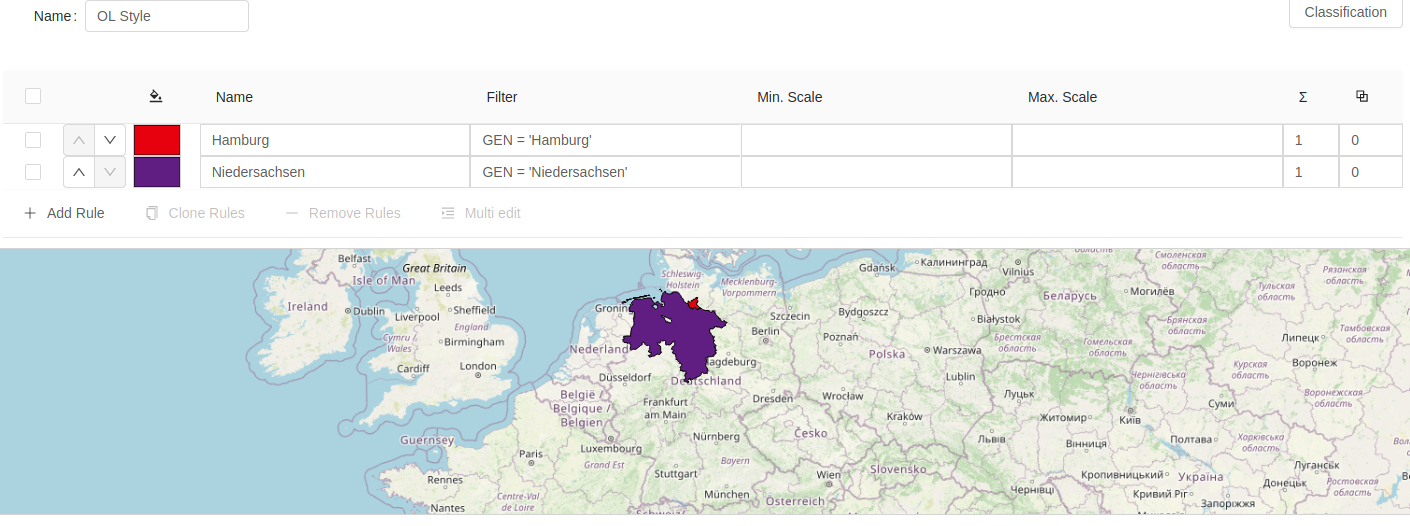
By that, we activated data dependent features, such as classifications. The application should now look as follows
(notice the enabled Classification button):